Watch video on you tube https://youtu.be/6McI-Y6EZrU
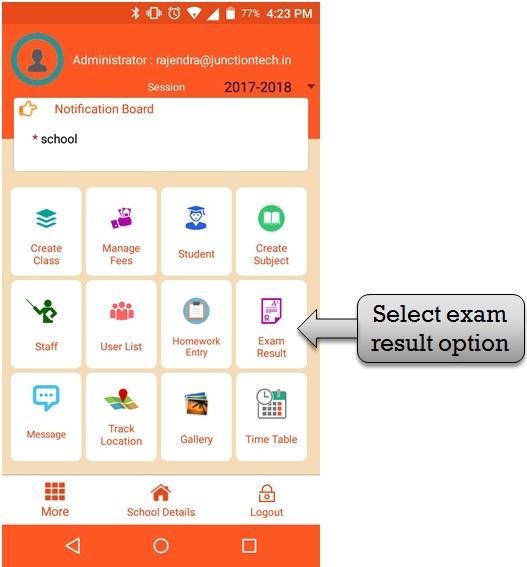
step:1st – Exam management app software you have to Create Student Exam Result please select Exam result option then create student result.
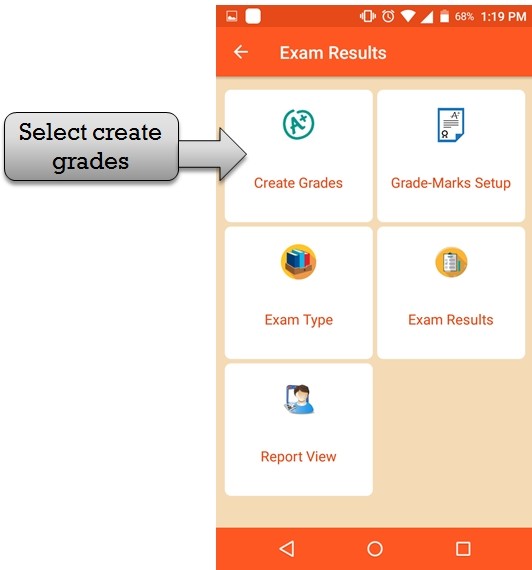
step:2nd – In Exam management app software create exam grade so please click create grade option then create exam grade .
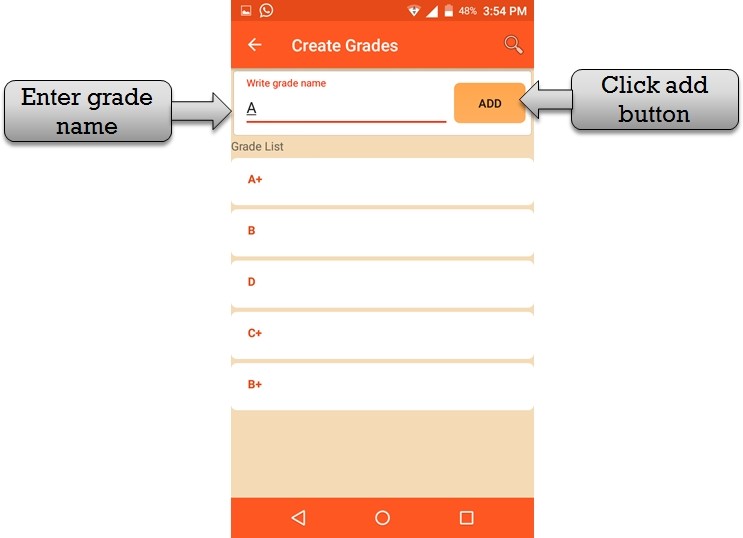
step:3rd – Create grades in Exam management app software please enter grade name then click add button grade create successfully .
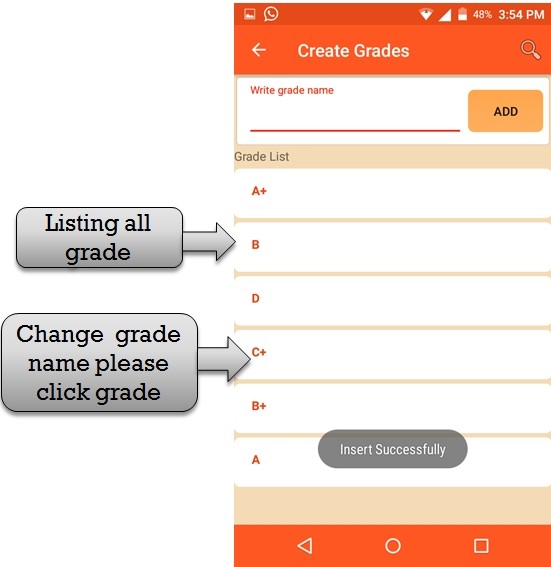
step:4th – Listing all grade name list .if in case you have change grade name please click grade name then open previous grade value .
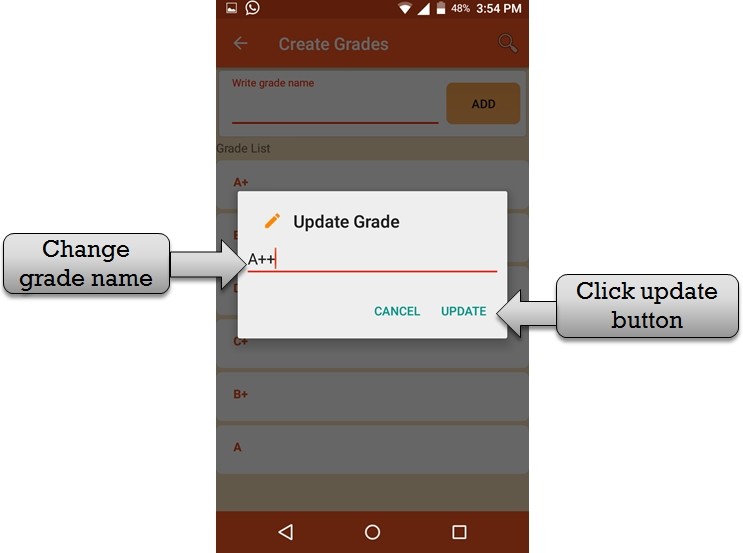
step:5th – You have to change grade name then click update button grade name change successfully .
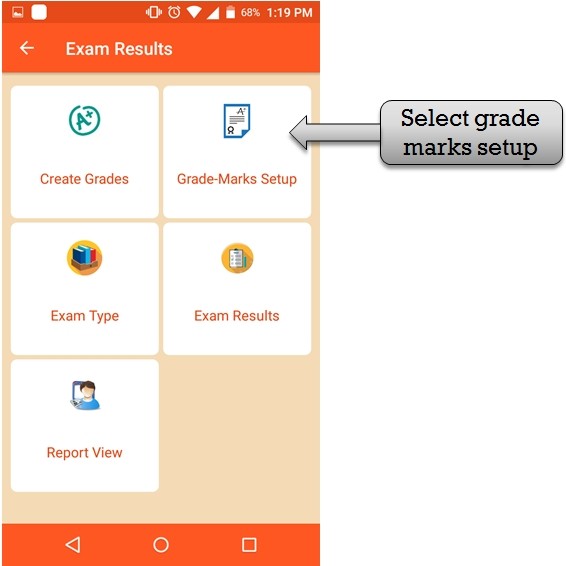
step:6th – You have to select grade marks setup option in Exam management app software then create student exam grades .
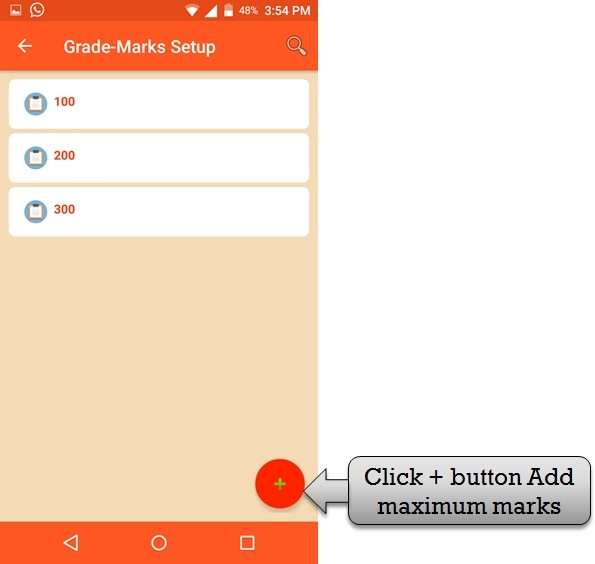
step:7th – Create student exam maximum marks then create student exam grade please click + button then open maximum marks enter form .
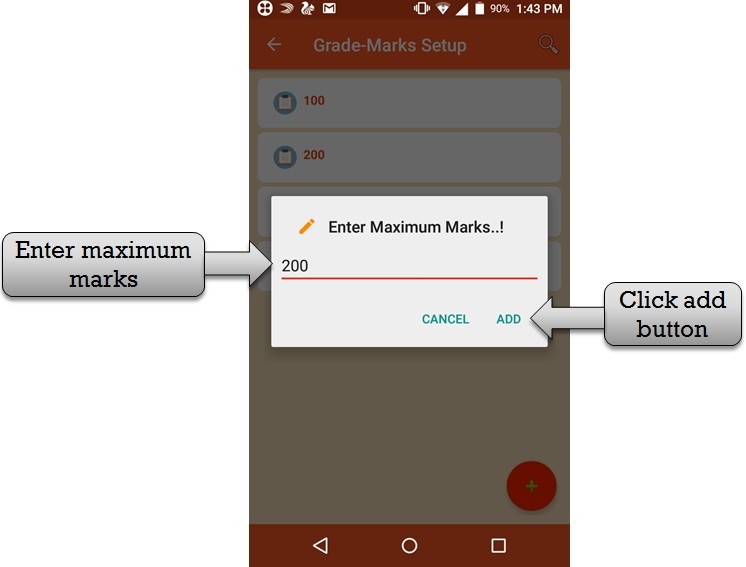
step:8th – Please Enter maximum Exam of marks then click add button maximum marks add successfully .
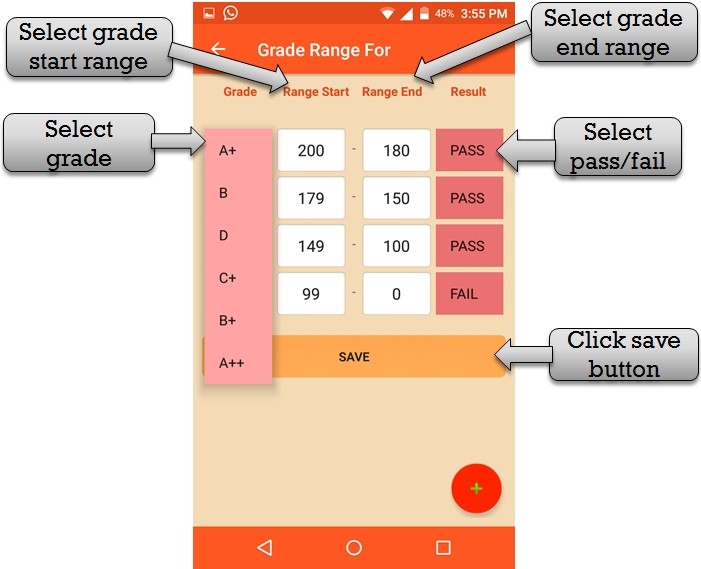
step:9th – You have to see grade list then result list and range start marks and range end marks .
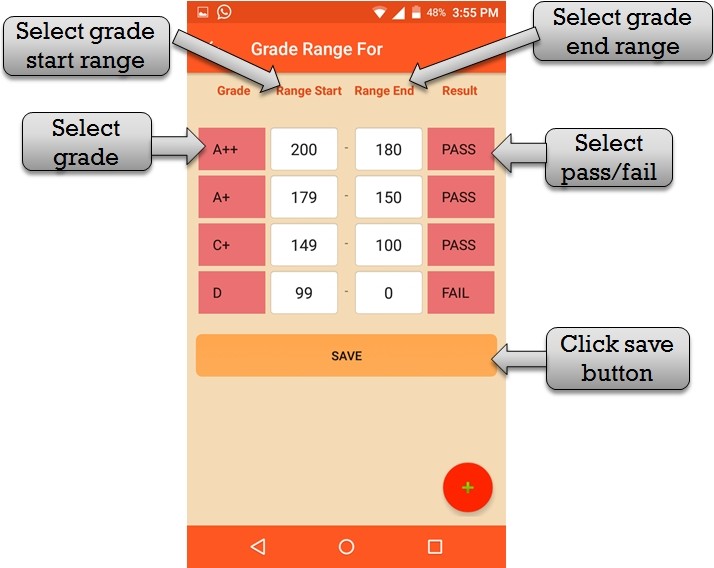
step:10th – In Exam management app software Please select grade then enter range start marks and range end marks for example( you have to select A++ grade then enter range start marks(200) and range end marks (180 ) , create second grade select A+ grade then enter range start marks(179) and range end marks(150 ) ) and click save button grade create successfully
step:11th – Listing exam marks then you have to change grade name and result status please click on exam marks then open previous vale of grade , grade range .and result status .
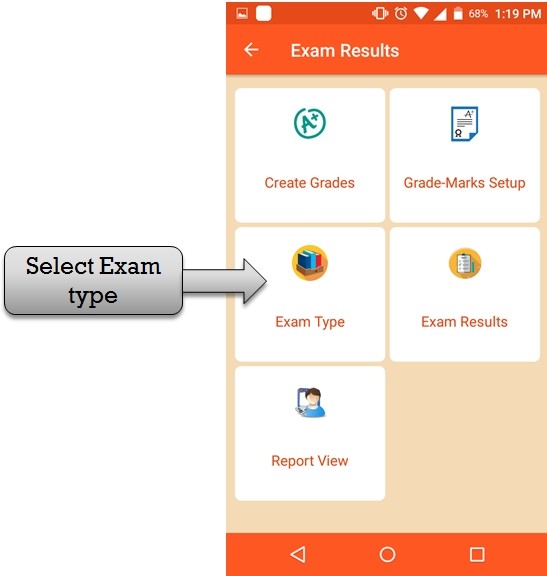
Step:12th You have to Create exam type so please select exam type option then create exam type .
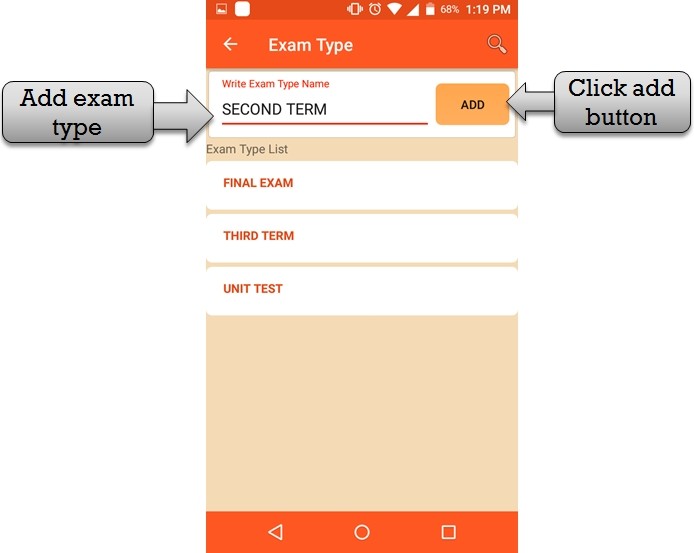
Step:13th Please enter exam type name for example (first term exam ,final term exam etc) then click add button exam type successfully created .
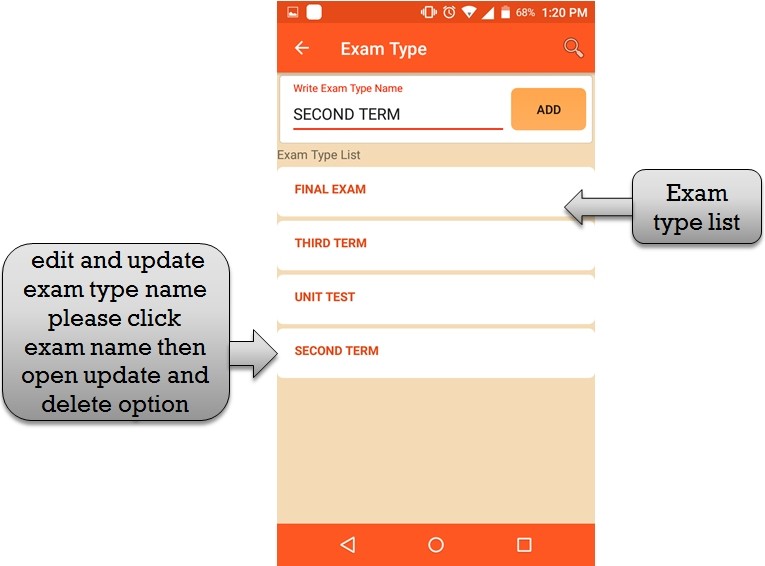
Step:14th Listing all exam type name then you have to change any exam type name please click exam type name then open update and delete option.
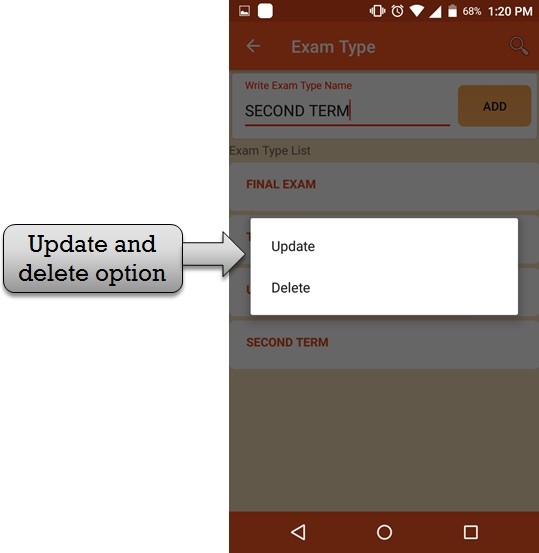
Step:15th Select update option then open exam type previous value and select delete button exam type delete successfully.
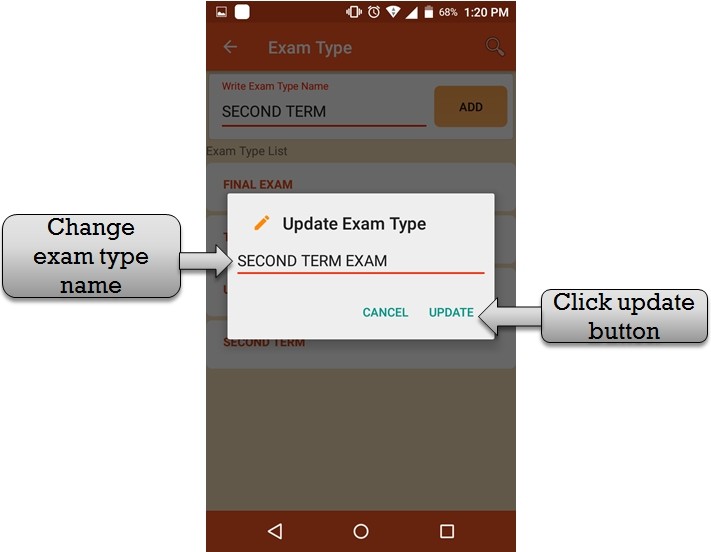
Step:16th Select update option then change exam type name then click update button exam type change successfully .
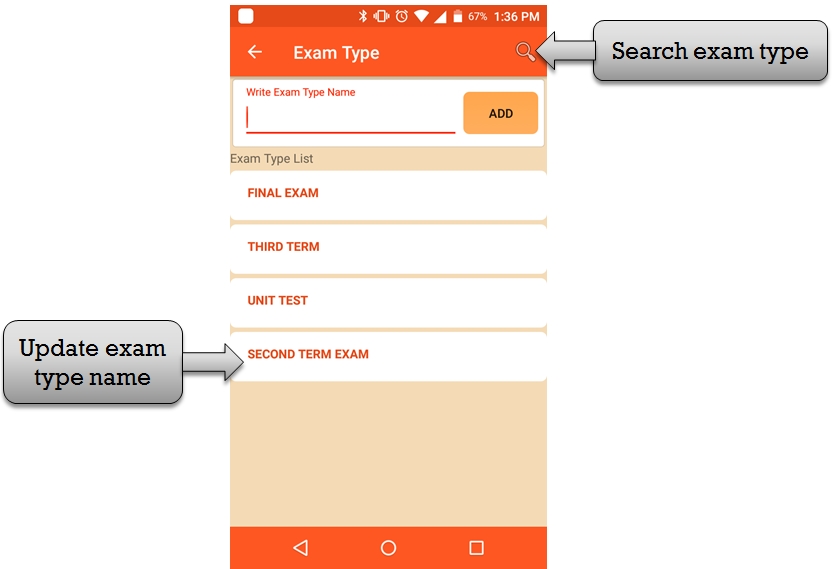
Step:17th Listing update exam type name .you have to search any exam type please enter exam type name in search box .
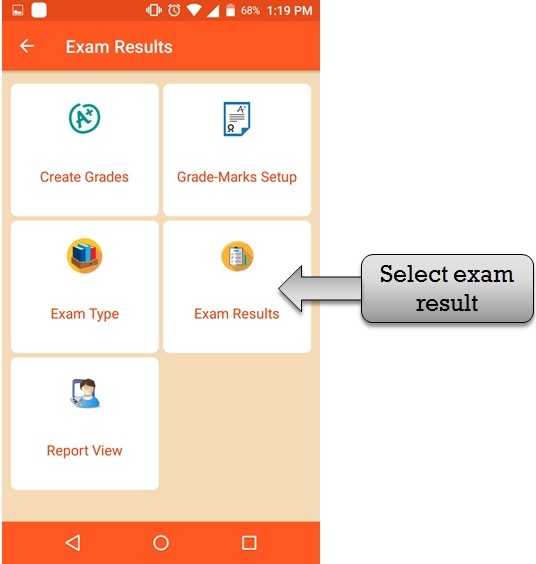
step:18th -Please select exam result option then create student exam result .enter student exam marks and grade .
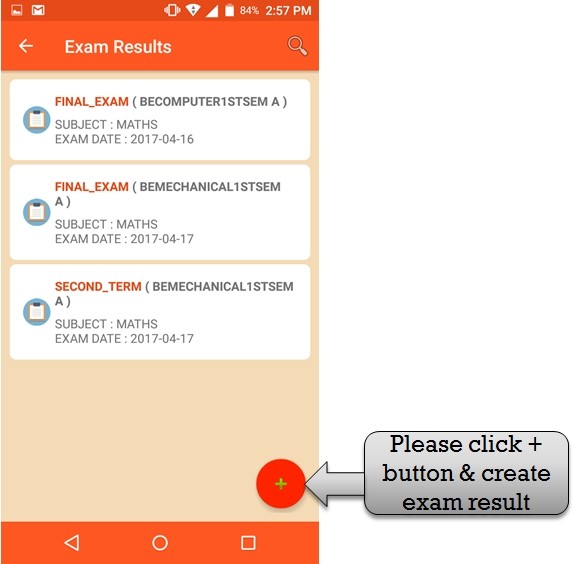
step:19th Create student exam result please click + button then open exam result created form open .
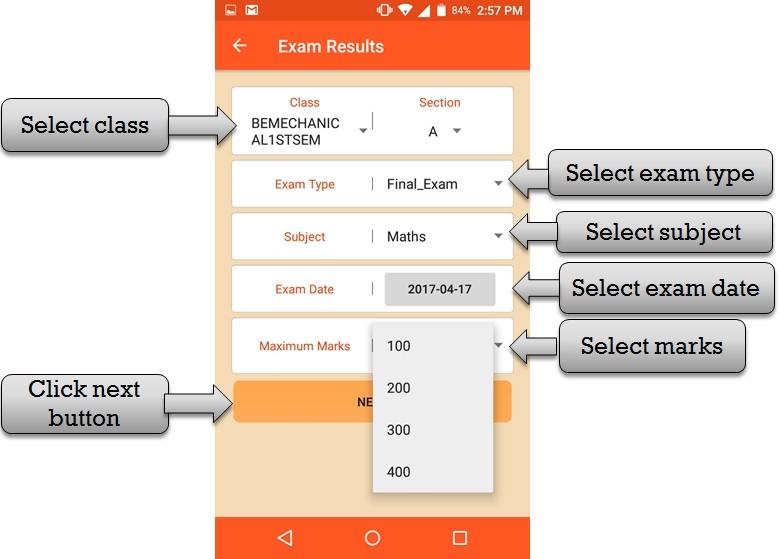
step:20th – Create exam result please select class name , section name ,exam type , subject name ,exam date and select maximum marks then click next button class result setup created .
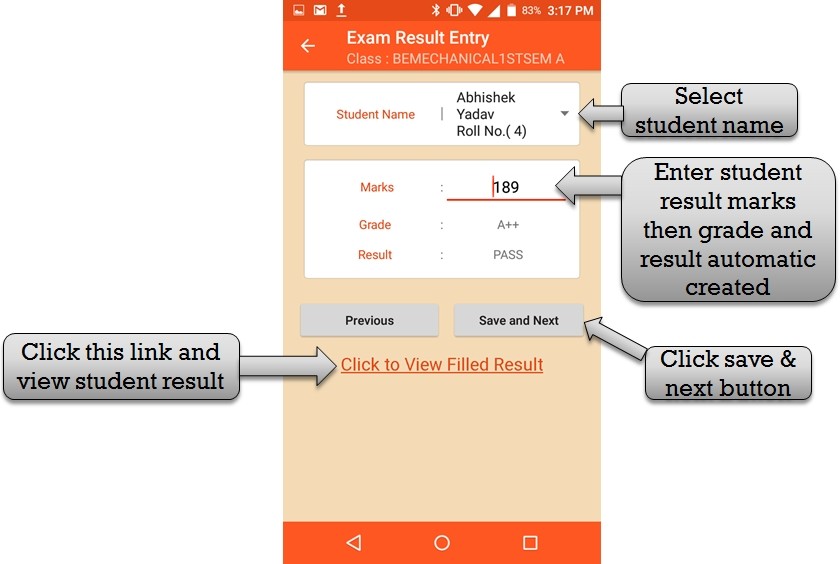
step:21th – Create student result so please select student name enter student exam marks then grade and result automatic created then click save button student result created successfully you have to see student result list please click view link .
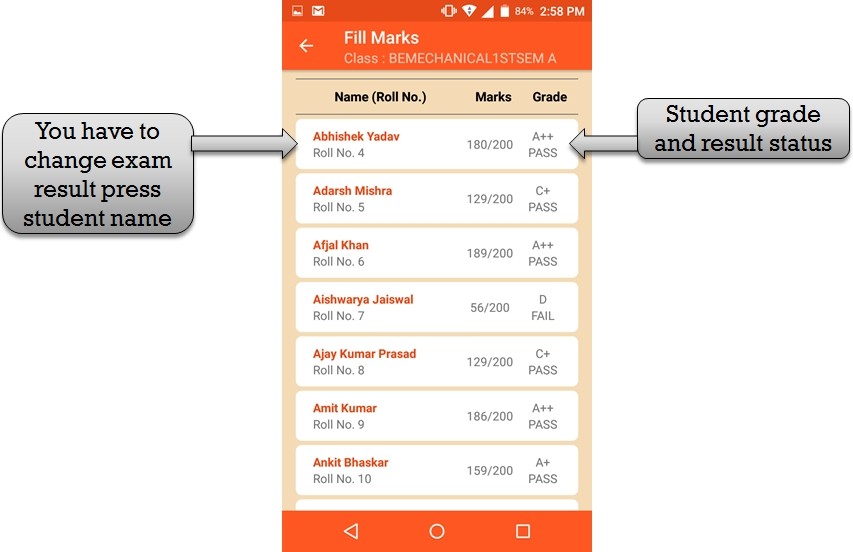
step:22th -Listing all student name , marks and grade . if in case you have to change student marks press student name then view edit option .
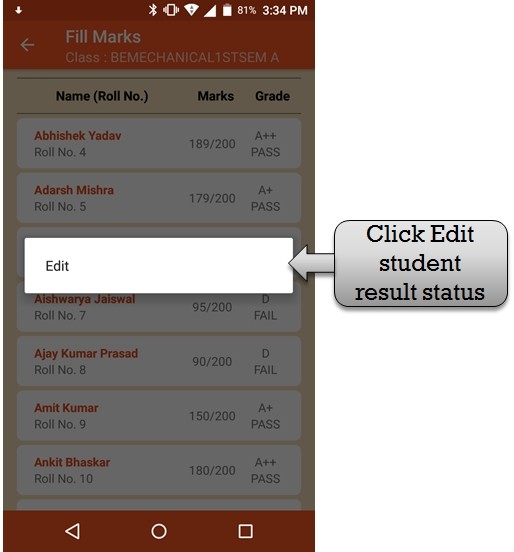
step:23th – Please click edit button then open student previous result you have to change student marks then student result change .
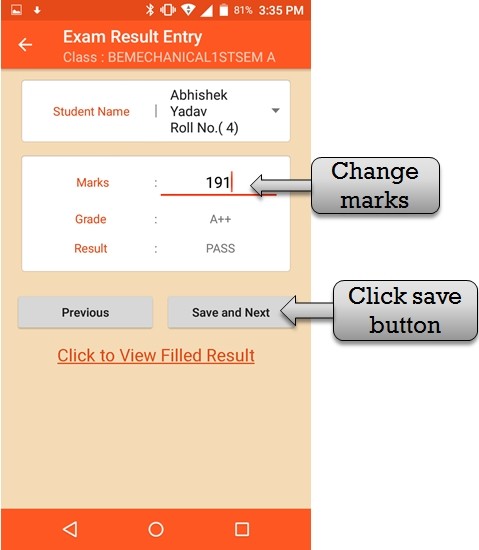
step:24th – Change student exam marks then change exam grade and result then click save button student result successfully change .
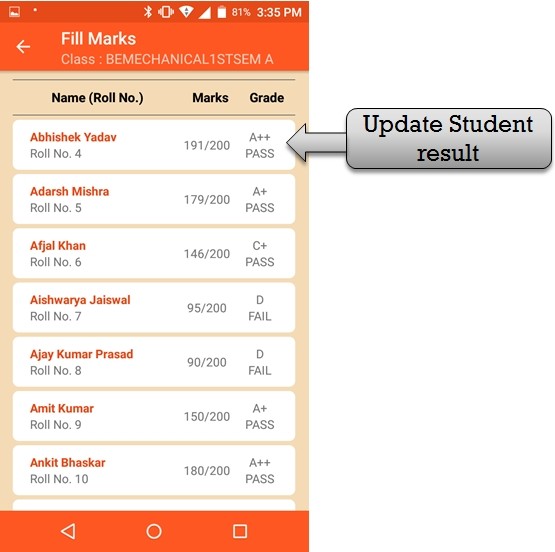
step:25th – Listing student update exam result show . student exam marks change successfully .
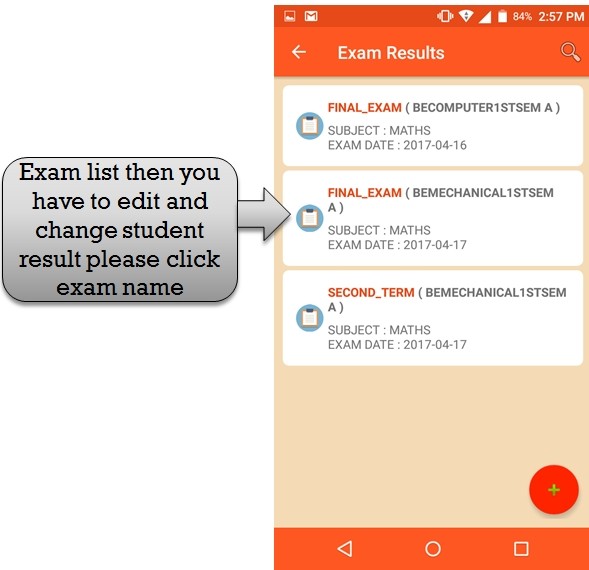
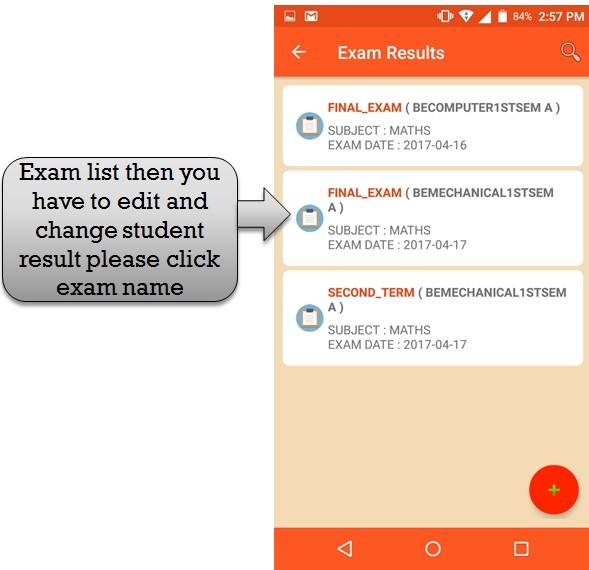
step:26th – Listing all exam list . you have to change student result please click exam name then open student previous result . change student marks then click save button student result change successfully save .

Step:27th –You have to check student exam result , homework and attendance please click report view option then check student result , homework and attendance status .
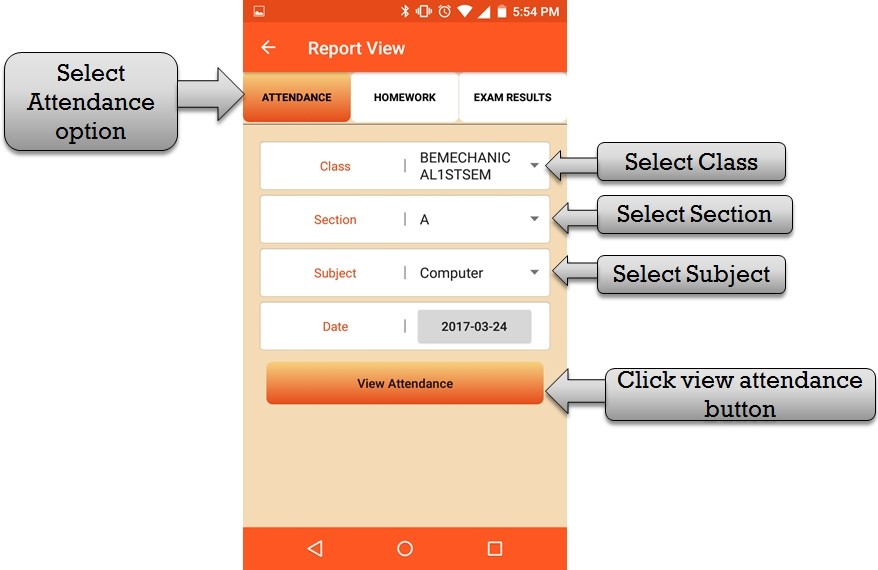
Step:28th- Select attendance option then select class name , section name , subject name and select attendance date then click view attendance button .
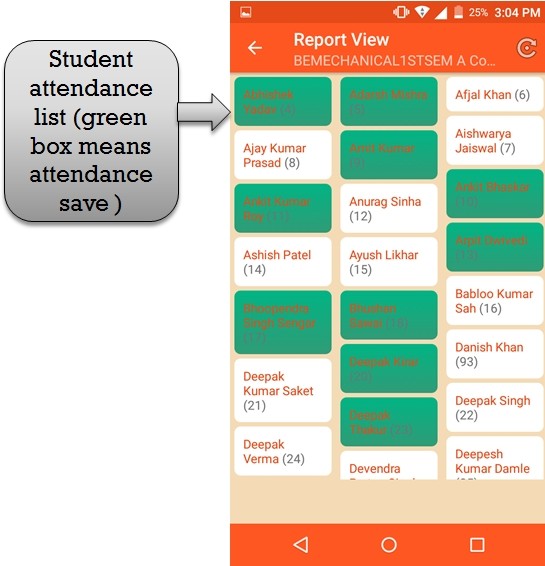
Step:29th- Open all student name behalf on a class name . some student name in green box that means present student name .
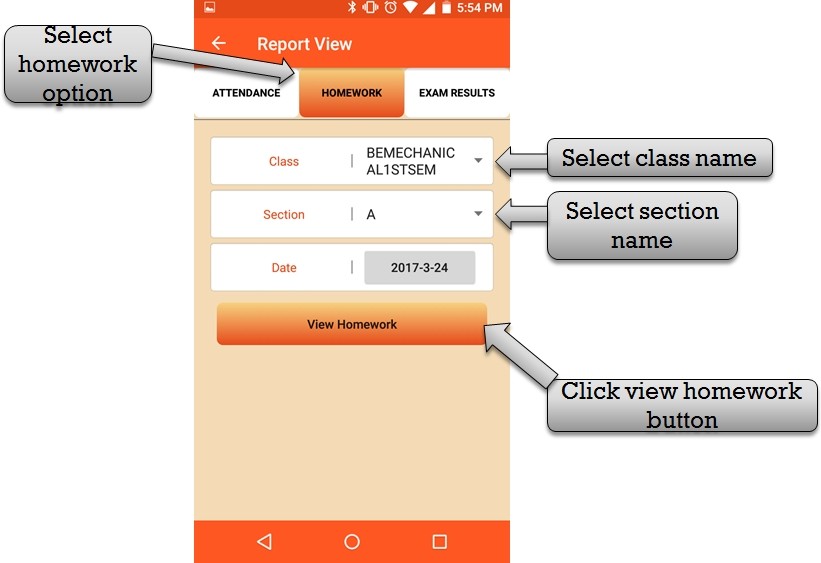
Step:30th- Select homework option then select class name , section name , and date then click view homework button then open homework date list .
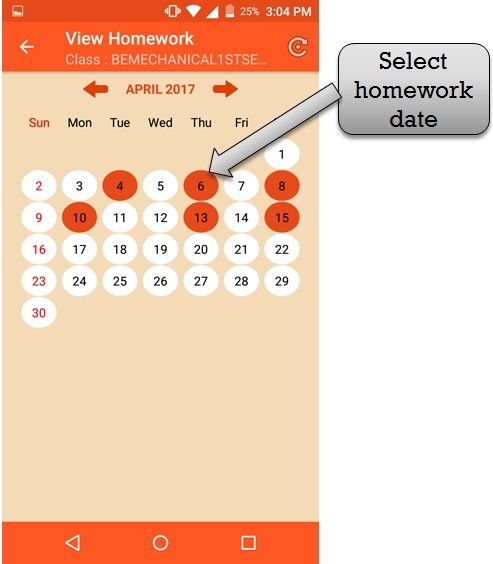
Step:31th – Please click on homework date then open student homework list .
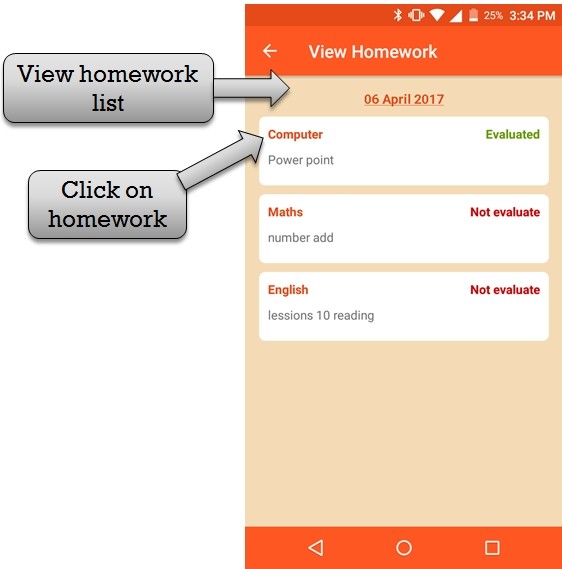
Step:32th – Listing all homework list and homework status (complete or not complete) . you have to check how many student homework complete or not complete please click subject name then open student list .
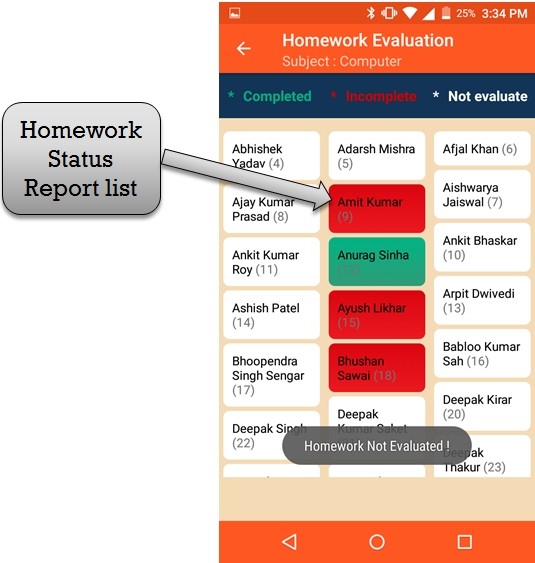
Step:33th- Listing all student name and student name in green box that means student subject homework completed . student name in red box that means student subject homework incomplete .
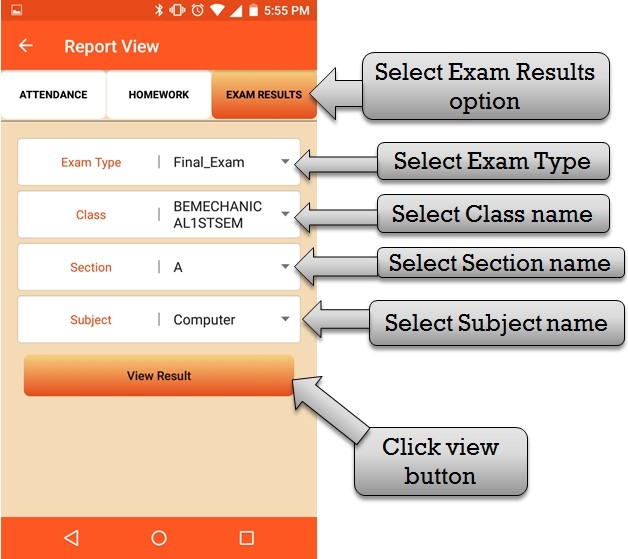
Step:34th – Check student exam result so please select exam type , class name , section name and subject name then click view result button .
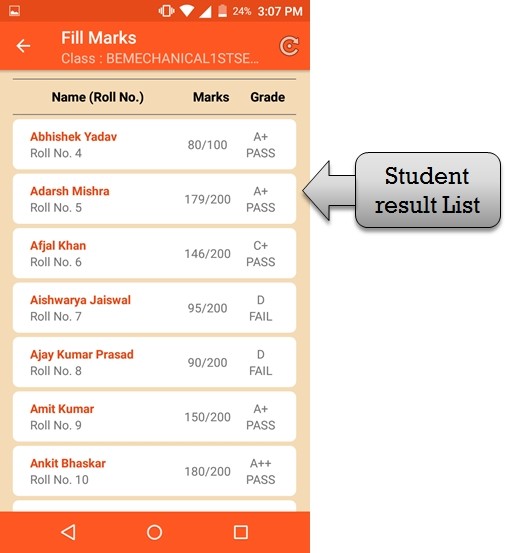
Step:35th – Listing all student result list display student name ,roll number , exam marks and exam grade . teacher check student result .
